Cute blouse with hem ruffle
Difficulty level
Beginner
Time to Complete
Evening
Print
Share

You will need
- 1.0 m light cotton or viscose fabric, 140 cm wide
- 0.7 m bias tape
- 2 buttons
- Tear-away stabilizer
- Click on the button to download the pattern
- BERNINA 335
- Ruler foot # 86
Cutting out (add seam allowances to all pieces according to your own judgment)
- 2 x blouse pieces on the fold according to pattern piece
- 2 x sleeves 60 to 70 x 13 cm
- 2 x hem ruffles approx. 90 to 110 cm x 9 cm each.
- 2 x polo shirt button facings 13 x 5 cm, finished width 2.5 cm.
Download pattern
Instructions
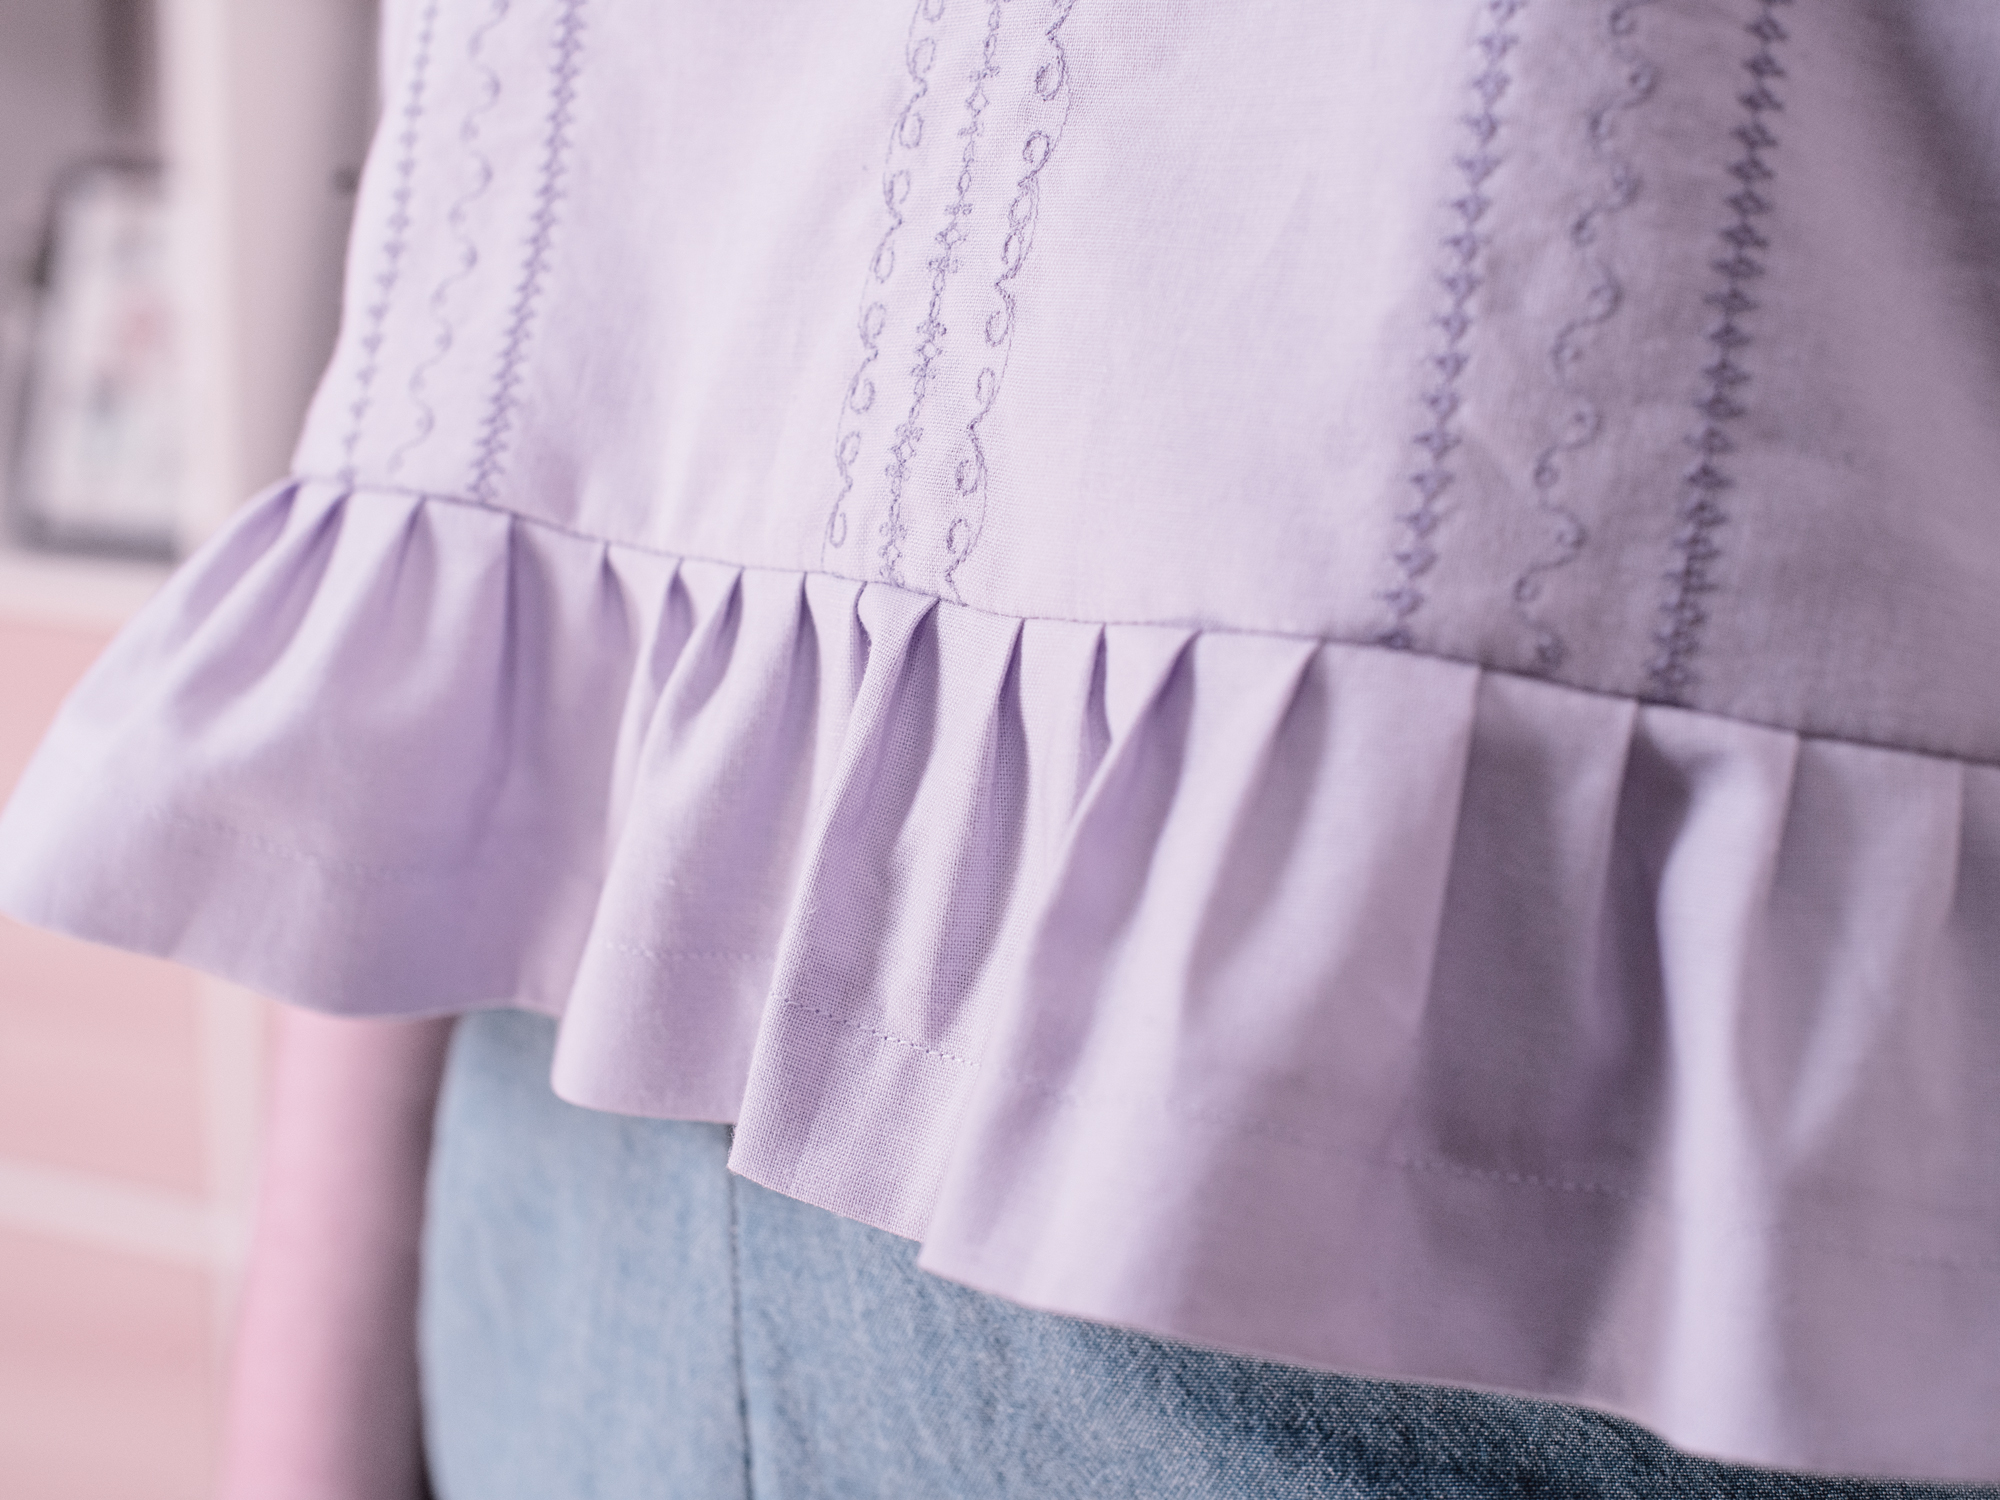
Embellish the front piece with decorative stitches
- Draw the center line on the fabric fold, place the stabilizer underneath and sew the first row of decorative stitches. Sew another decorative stitch to the right and left, one presser-foot width away.
- Draw another line about 8 – 9 cm away on either side of the fold, sew a row of decorative stitches and then another row next to it, one presser-foot width away.
- If you wish, you can then sew another border next to it. For example, Annika used stitches 86, 90, 95 and 97.
Sew the neckline
- Close the shoulder seams with the right sides together
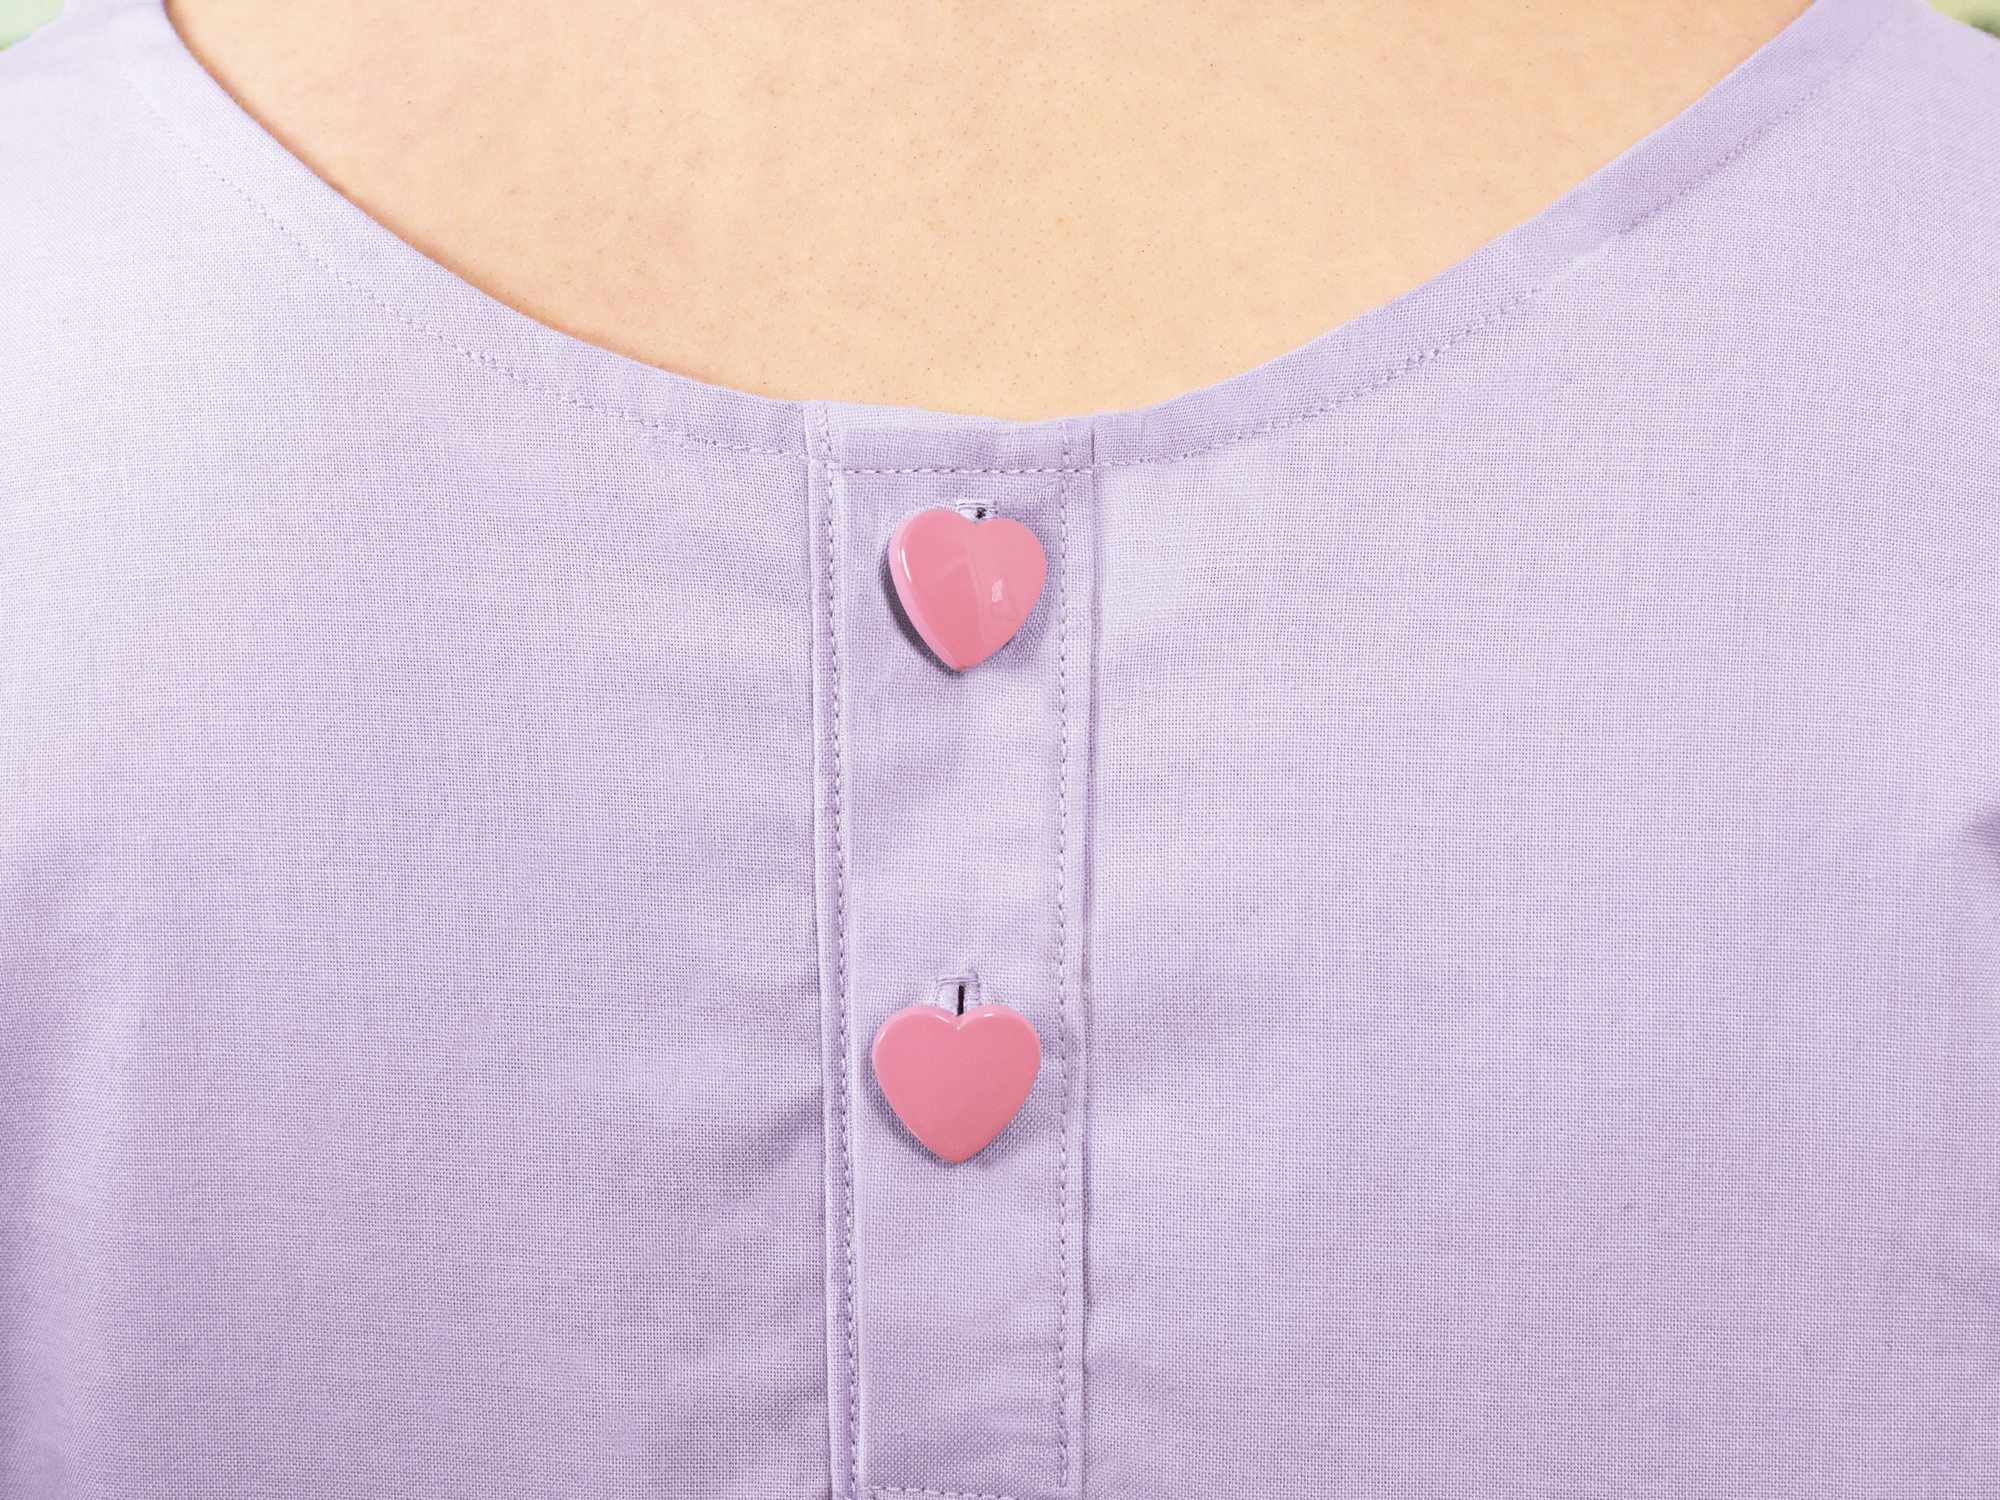
- Cut a slit about 4 cm wide in the middle of the back.
- Sew bias tape onto the neckline starting from the slit with the right sides together.
- Cut into seam allowances on the neckline.
- Iron tape inwards and pin.
- Stitch on the tape on the right side about 1 cm from the edge.
Polo shirt closure on the back
- Iron fusible interlining onto the wrong side of the fabric at the end of the slit and onto the longitudinal halves of the button facings. Draw a seam line on the back according to the pattern.
- Sew the button facings onto the right and left seam line with the right sides together.
- Cut the slit and cut into the corners, as shown in the drawing on the pattern. Iron the seam allowances of the attachment seams into the button facing.
- Iron the seam allowances of the open longitudinal edges inwards.
- Fold the whole strips inward lengthwise to create a finished width of exactly 2.5 cm.
- Place the facing strips with the wrong sides together along the ironed fold and stitch along the top edges.
- Turn over, pin on the loose long edge and topstitch on the right side.
- Pin the right facing onto the left. Pin the bottom edge onto the back with the right sides together and close the bottom edge of the slit.
- Create buttonholes in the top button facing and sew 2 buttons in the corresponding places on the bottom facing.
Hem ruffle and sleeves
- Sew the hem ruffles together on one narrow side. Hem one of the long edges. Hem each of the sleeves along one long edge.
- Attach ruffler foot 86, set to every 6 stitches and a stitch length of 5. On a remnant of fabric, sew a length of ruffle using this setting. The difference in length between the unruffled and ruffled edges should create a ruffle factor of approximately 1.5. That is, if the unruffled edge is 60 cm long, the ruffled edge should be approximately 60 divided by 1.5, i.e. 40 cm long. If necessary, change the setting according to the ruffler foot instructions. For larger differences, change the pleat depth via the screw.
- Place the open longitudinal edges on the sleeves and pleat the hem ruffles. Tip: You can see here exactly how this works.
- As an alternative to the ruffler foot, make tucks in the edges using a long straight stitch and then tighten the bobbin thread to ruffle the fabric.
Sleeve edge
- Adjust the pleated sleeve edge to the size of the arm holes.
- Sew the sleeves onto the arm holes with the right sides together.
- Close the sleeves and side seams.
- Cut into the seam allowances on the curve under the arm.
One final step and your new blouse will be ready!
- Adjust the hem ruffle to the size of the bottom edge of the blouse.
- Close the ruffle to create a ring and sew onto the top with the right sides together.